

Picking up from where we left off last week, today I’m going to walk through how I created a watch face to show data from the Sunshine phone app.
So… DataItems are being sent from the phone using the Wearable DataApi. We need to retrieve those items on the watch.
I accomplished this using a service that is woken by the system when it receives a BIND_LISTENER intent.
The wearable service needs to extend the WearableListenerService class.
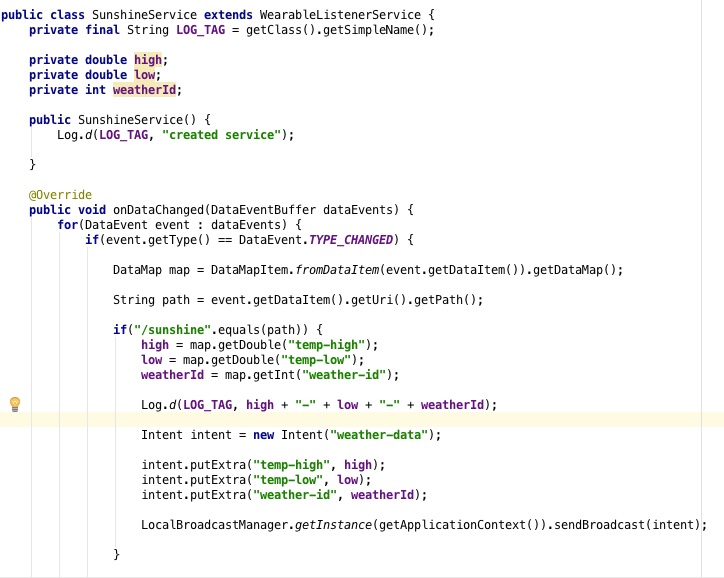
Here is my listener service:
(Enclosing brackets are not shown for brevity.)
This class is pretty straightforward. The onDataChanged method receives data events from the system. Then, we compare the path of the data items received to the expected path (in this case “/sunshine”). If the paths are equal (deep equals, of course), we pull out the data items, repackage them into an intent, and send out a broadcast. I used a broadcast because there is both a watch face and a wearable app that expect this data (broadcast receivers would make the data accessible to both with one broadcast from this class). We also need to declare this service in the Android manifest file as well as that it receives BIND_LISTENER intents. Here is the code that does this from the manifest:
<service
    android:name=".SunshineService"
    android:enabled="true"
    android:exported="true">
    <intent-filter>
        <action android:name="com.google.android.gms.wearable.BIND_LISTENER" />
    </intent-filter>
</service>
The watch face class is really interesting. It doesn’t use xml to define layouts the way a standard Android app does. It draws the elements directly to the screen (this allows for rapid refreshing). A lot of interesting stuff happens in this class, so let’s dive in!
First of all, I used the Android Studio create watch face wizard to create a digital watch face. We are provided with a watch face that, starting off, draws the time to the screen in the onDraw method.
We need this class to:
-register a broadcast receiver to handle the data the service is broadcasting
-draw the data to the screen
-account for both square and round watch faces (I won’t go into detail about this right now).
We only need to create the broadcast receiver once. Therefore, we initialize it in the onCreate method. Here is the code snippet:
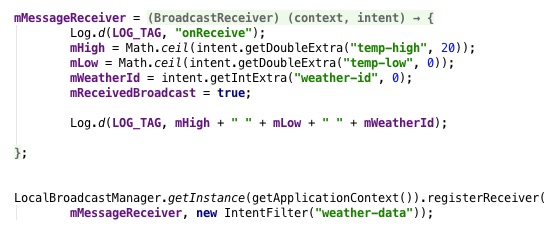
mMessageReceiver is declared globally and initialized here, as are mHigh, mLow and mWeatherId. The extra parameter in the getDoubleExtra method is a default value in the event the expected data items are null. mReceivedBroadcast tracks whether or not the data has been received. Simple enough!
Now that we have the data we have to draw it to the screen. The aptly named onDraw method is the best place to handle this. Here is the code snippet:
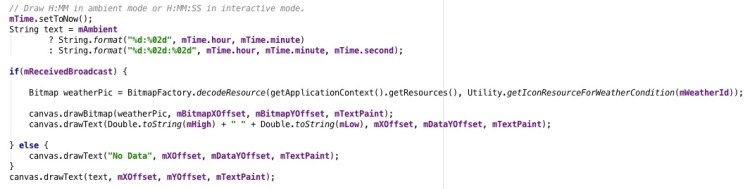
We need to check if a broadcast was received, which we do so using the mReceivedBroadcast boolean initialized earlier. If a broadcast was received then we can draw the data items to the screen. First, we get the picture associated with the mWeatherId (a very straightforward process, not interesting enough to write about here). Then, we can draw that picture to the screen using X and Y values delineating where on the watch face the picture should be located. Next, we draw a very simple string consisting of the high and low temperatures to the screen. Finally, we draw the time.
In the event that mReceivedBroadcast was false we display a simple message saying “No Data”, which prompts the user to connect their watch to their phone.
Here is the final product:
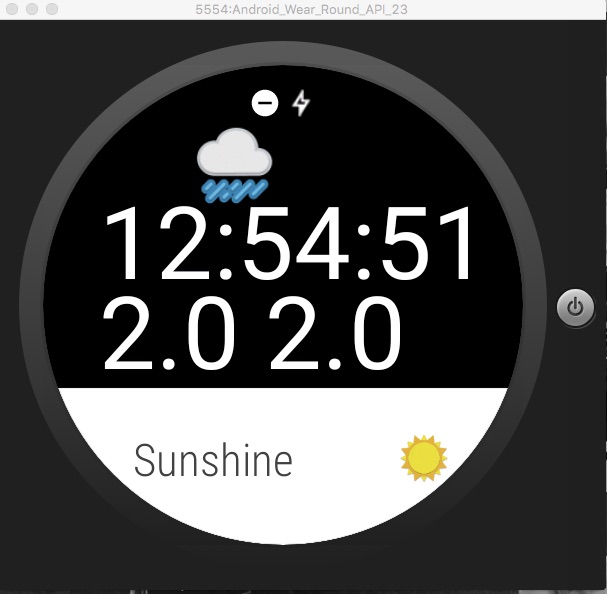
The layout would need some refining if this were a production quality app. But, the functionality is there!
Let me know if you have any questions!
